Skip to content
Nanaimo Custom Bathrooms

Bathroom Walls, Ceilings & Finishing

Drywall Installation

Board is chosen for what goes on top of it: the finish level under tile and the finish level under paint are not the same wall.

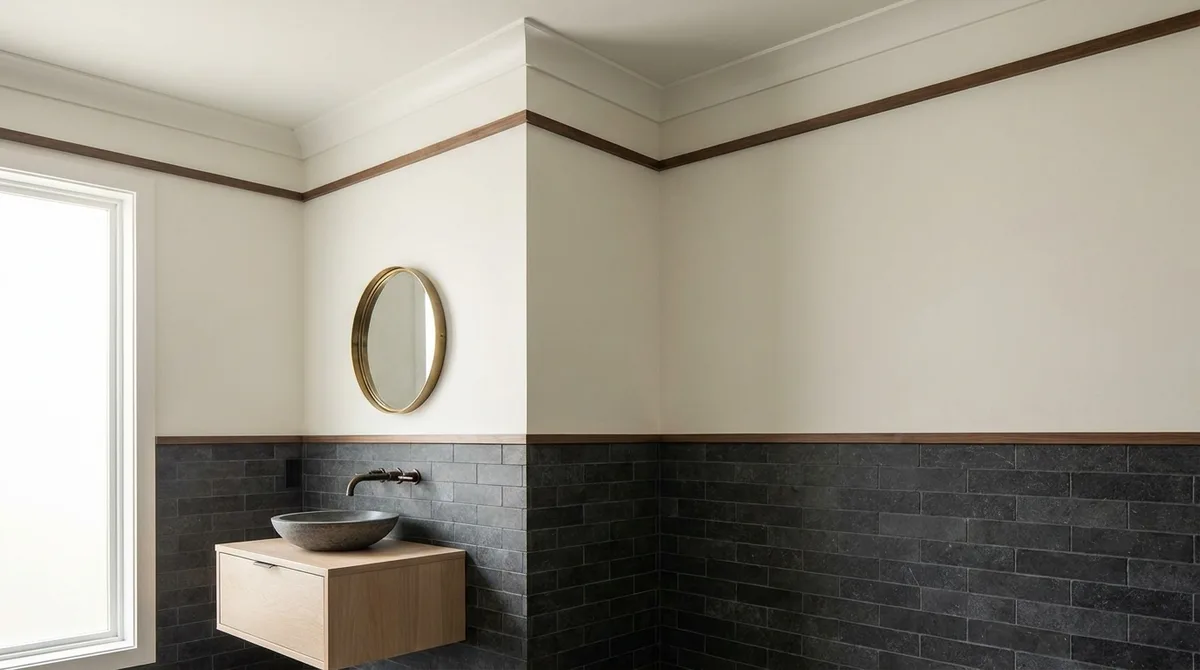
A bathroom wall with fresh drywall, taped joints and painted trim beside a framed mirror

What this involves

Drywall Installation

The bathroom wall begins with a choice made for what happens on top of it. Moisture-resistant board or standard drywall — that decision is not about the bathroom as a room, but about the finish that will cover the board. Paint does not demand resistance; tile and waterproofing do not care what is underneath either, so long as the board is stable. But the way you finish the surface against the board — the taping, the joints, the corners — that changes entirely depending on whether the wall is going to be painted or tiled.

A wall under paint needs every imperfection at the board joints faired smooth. The tape is covered completely, the compound fills the gaps and then gets sanded to nothing, so the wall reads as one seamless surface. A wall under tile does not need that. The finish level drops dramatically. The tape does not have to disappear; the joints do not have to be perfect; the wall does not have to be planed flat. What matters is that the board is stable and the tile can stick to it. Putting the same finish level behind tile that you put behind paint is throwing money away.

A bathroom is full of angles. Internal corners where two walls meet, external corners at the room perimeter, the line where ceiling meets wall — every one of these is a place where board meets board, tape meets corner bead, and the work shows if it is done carelessly. An internal corner in a bathroom, where humidity rises every time someone showers, has to be taped in a way that sits tight and does not work loose over years. An external corner — the arris edge that sticks out into the room — has to be straight enough to not catch the eye and strong enough to not dent.

Sanding is the part most people do not think about until they are living in a house with drywall dust in every room. New board is sanded to prepare for finish; joints are sanded after the compound goes on; edges are sanded after primer. If the house is occupied, every bit of that dust goes everywhere. Closed doors do not stop it. The dust gets into every surface, every light fixture, every piece of equipment. The contractor who cares about this part has a plan for containment before the first board goes up. The state a wall is handed over in — swabbed down and ready for paint, or still smudged with compound dust — makes the difference to how long cleanup takes afterward.

A wall that is out of plane — meaning the surface is not flat, but bows or ripples — shows in two completely different ways depending on what finishes it. Under paint, especially paint with any sheen and light raking across the surface, an out-of-plane wall reads as wavy. You see it every day. Under large-format tile, an out-of-plane wall creates tiling problems: the tile does not sit flat, or the grout joints widen where the wall dips, and the surface reads as sloppy. Small tile hides it better because each tile is small enough to conform slightly to the irregularity. This is why wall preparation — getting it reasonably flat before anything goes on top — matters more than most people realize.

  • Licensed & insured
  • WorkSafeBC coverage
  • Written quotes & contracts
  • Built to BC Building Code

Why it matters

What you get

Moisture-resistant board where it actually matters

Standard drywall absorbs water. Moisture-resistant board resists it, at least for a while. In a bathroom, the places that need resistance are the zones that stay damp for hours — behind the toilet, against the wall where the towel rack drips, above the tub surround. These are places where the wall stays wet, not just splashed wet. Elsewhere in the bathroom, air moves and the wall dries. Standard board is fine there. The trade-off is simple: use resistant board where the wall genuinely stays damp; use standard board elsewhere and save money.

Finish levels under paint and under tile are not the same job

A painted wall requires what is called Level 4 or Level 5 finish — the joints are invisible, the surface is one seamless plane. Getting there means taping, compound, sanding, more compound, more sanding. Behind tile, the wall only needs Level 2 or Level 3. The tape can be visible if you look closely. Joints do not have to be perfect. A flat, stable substrate is what matters. Over-finishing behind tile is wasted labour and wasted time. The specification has to match what goes on top.

Internal and external corners take different approaches

An internal corner — two walls meeting — needs a taped joint that stays tight when humidity swings. A corner bead on an external corner — one that sticks into the room — has to be straight enough that you do not see the irregularity when light rakes across it. Internal corners in a bathroom, where the walls are warm and damp one moment and cool and dry the next, are where moisture works on the tape if it is not done right. The external corner is purely a matter of visual straightness and durability against impact.

Dust and how it moves through an occupied house

Every step of boarding — cutting, taping, sanding — creates dust. In a house where people are still living, that dust ends up everywhere: in bedrooms down the hallway, on kitchen surfaces, inside air handlers and light fixtures. Professional board work means controlling it: covering doorways, using dust collection, sealing off the bathroom as much as the work allows. The wall handed over clean, with dust wiped down and any residue addressed, is a wall that does not leave cleanup in the owner's hands for months afterward.

How it runs

The process

  1. 01

    Choose board for what goes on top

    Before any board arrives, the finish plan has to be settled: what wall is getting painted, and what wall is getting tiled? Moisture-resistant board goes on the walls that will stay damp — behind fixtures, in the wet zone, above the tub. Standard board goes elsewhere. The choice is not a guess; it is a direct consequence of the finish plan. If paint is going up, you can relax slightly on the resistance. If tile and waterproofing are going up, standard board is fine even in the wet zone, so long as the waterproofing layer above it does its job.

  2. 02

    Tape and finish to the level the top surface demands

    Once the board is up, the level of finish gets specified: Level 2, Level 3, or Level 4. Behind paint, Level 4 is the standard — every joint taped, every corner perfect, the entire surface ready to show anything the light throws at it. Behind tile, Level 2 or Level 3 saves work without any loss of result. The tiling crew will not care that the joints are not perfect; they will care that the board is stable and flat enough for tile. This is where the specification drives the method, not the other way around.

  3. 03

    Sand, clean and hand over in a state ready for the next trade

    Once compound is applied, the wall is sanded. The dust from sanding goes everywhere. The contractor who manages this part has sealing, dust collection, and a cleanup plan in place before the first piece of board is hung. The wall gets handed over to the next trade — waterproofing crew, or primer and paint — in a condition where the next person can start work without first spending a day cleaning.

Questions

Frequently asked

No. The walls that stay genuinely damp for extended periods — behind the toilet, around the tub surround, above the floor at the edges — benefit from it. The rest of the bathroom, where air circulates and the wall dries between showers, can use standard board. The real protection in a bathroom is not the board; it is the waterproofing layer and the junctions that shed water. Board choice is about where the wall stays wet, not about the room as a whole.

Under paint, the wall needs Level 4 finish — smooth, seamless, perfect. Under tile, Level 2 or Level 3 is enough. The tile sits on top of the board and waterproofing, not on the finish of the joints. A wall under tile does not have to look perfect to the naked eye because the tile will cover it. Specifying Level 4 finish behind tile is spending money on work nobody will see.

Significant dust. Every cut of the board at a fixture, every sanding pass, every cleanup of edges produces dust that travels on air currents through the whole house if not managed. In an occupied house, professional boarding work means sealing the bathroom, controlling dust at the source, and cleaning thoroughly before handing over to the next trade. A wall handed over clean is one where the rest of the house does not spend months processing boarding dust.

Under paint, the eye catches any waviness the moment light rakes across the surface at an angle. An out-of-plane wall under paint reads as rippled or wavy. Under tile, the same out-of-plane wall becomes a tiling problem: grout joints widen where the wall dips, tile does not sit flat, the surface looks sloppy from the side. This is why wall prep — getting the board reasonably flat before finish goes on — matters more with large tile than with paint.

Related

More in bathroom walls, ceilings & finishing

Boarding out a bathroom?

What goes on top decides what the board underneath has to be.