Skip to content
Nanaimo Custom Bathrooms

Bathroom renovation services

Bathroom Walls, Ceilings & Finishing

Wall and ceiling build-ups chosen per surface, according to what each part of the room is actually exposed to.

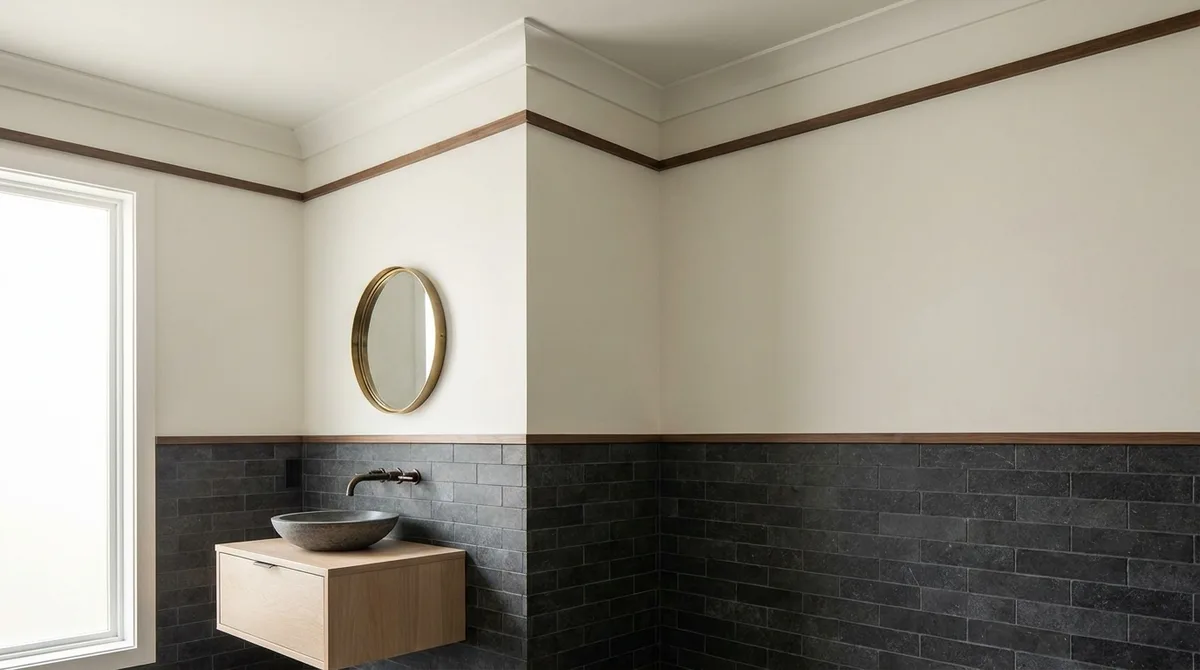
A bathroom wall with fresh drywall, taped joints and painted trim beside a framed mirror

Wall and ceiling build-ups chosen per surface according to what each part of the room is exposed to, rather than one board and one paint throughout.

  • Licensed & insured
  • WorkSafeBC coverage
  • Written quotes & contracts
  • Built to BC Building Code

What this covers

Walls, Ceilings & Finishing

A bathroom is not one environment, it is four. Inside the shower is continuous wetting. The wall behind the basin and the area beside the tub get splashed and wiped. The ceiling above the shower takes condensation without ever being splashed. And the wall behind the door is, in moisture terms, an ordinary bedroom wall. Specifying one board and one paint for all four is why bathrooms develop problems in specific, predictable places.

Board selection by zone. Inside a shower or tub surround, a cement or fibre-cement tile backer belongs behind the tile — moisture-resistant drywall is a different product for a different job and is not intended for continuous wetting. In the splash zone around the basin and outside the tub, a moisture-resistant board is appropriate. Elsewhere in the room standard board is fine, and using tile backer everywhere is money spent where it does nothing. The ceiling is where the specification is most often wrong: it is the coldest surface in a humid room and therefore the first place condensation forms, so a moisture-resistant or mould-resistant board there is worth the small premium even though nothing ever splashes it.

Taping and finishing to a level that survives the light. Bathrooms are small, brightly lit, and increasingly lit from the side by mirror sconces, which is the most unforgiving light there is for drywall. Raking light across a wall shows every ridge in a taped joint and every ring around a screw. That means joints feathered wide, corners run true, and a skim where the light will hit hardest. The other bathroom-specific detail is at the tile edge: where tile stops partway up a wall, the drywall face has to sit correctly relative to the tile plane so the transition can be trimmed or bullnosed cleanly, and that means the boarding thickness was thought about before the tile was chosen.

Paint that lasts in a wet room. Bathroom paint fails in two ways: it peels where it was applied over a surface that was not sealed and where condensation sits, and it grows mould in cold corners. A quality acrylic in an eggshell or satin sheen resists moisture and takes cleaning, while a flat finish on a bathroom wall is difficult to wipe and holds dirt. New drywall needs a proper primer sealer, not a diluted coat of finish paint, because the paper and the compound absorb at different rates and the difference shows through as flashing. Ceilings get the same treatment as walls in a bathroom rather than a chalky ceiling flat, because a ceiling flat has nothing in it to resist condensation.

Wallpaper is possible, with conditions. A well-ventilated powder room with no shower is a good candidate and a great place for a paper with real presence, since the surface area is small and the visual payoff is high. A main bathroom with a shower is harder: the substrate must be sealed and sized properly, a vinyl or non-woven product handles humidity far better than a traditional paper, and the seams need to be kept away from the wettest areas. Without adequate extraction, no wallpaper survives long, which brings the conversation back to the fan.

Ceilings. A well-finished, well-painted flat ceiling is the simplest option and usually the right one. Where a bulkhead conceals ductwork or a relocated waste line, it is worth designing rather than tolerating — aligning it with the shower enclosure or the vanity run makes it read as intentional. Tongue-and-groove ceilings suit older island homes well, and need a finish on all faces including the backs of the boards, plus room for movement, because a bathroom ceiling cycles through humidity twice a day.

Trim and moulding. Baseboard in a bathroom lives at the wettest point in the room. MDF baseboard wicks water from the floor and swells from the bottom edge — a common and entirely avoidable failure — so PVC, primed solid timber or a moisture-tolerant alternative earns its place here, sealed on the bottom edge before fixing and caulked to the floor so water cannot get behind it. Casings and panelling follow the same logic, and sill details at a bathroom window need particular attention because condensation collects there.

Mirrors and hardware are the details people touch. A mirror needs blocking positioned during framing; a large frameless mirror is heavy and cannot rely on adhesive alone. Towel bars, hooks, a roll holder and grab rails all need solid backing rather than drywall anchors, and their positions are worth deciding on the plan — a towel bar within reach of the shower, a hook where a dressing gown actually goes, a rail that does not foul the door swing. It is the least expensive part of the job and the part interacted with most often.

Why it matters

What you get

Board specified zone by zone

Tile backer in the wet zone, moisture-resistant board in the splash zone and at the ceiling, standard board where nothing ever reaches it.

Finished for side lighting

Joints feathered wide and corners run true, because mirror sconces throw the raking light that shows every ridge and screw ring.

Tile edge planned into the boarding

Board thickness is set against the tile plane so the transition where tile stops can be trimmed cleanly rather than bodged with a bead of sealant.

Paint system built for humidity

A proper primer sealer over new board and an acrylic eggshell or satin that resists moisture and takes cleaning, on ceilings as well as walls.

Trim that will not swell

Baseboard material chosen for the wettest line in the room, sealed on the bottom edge and caulked down so water cannot sit behind it.

Backing set for everything that gets pulled

Mirrors, towel bars, hooks, holders and rails fixed to blocking installed during framing rather than to drywall anchors.

How it runs

The process

  1. 01

    Zone the room

    The wet, splash, condensation and dry areas are identified and the board specification is set for each before any sheeting is ordered.

  2. 02

    Board and tape

    Sheeting is fixed with joints staggered away from openings, then taped and finished to a standard that will survive side lighting.

  3. 03

    Set blocking and prepare openings

    Backing for mirrors, hardware, rails and any recessed cabinet is installed, and openings are prepared for trim and tile transitions.

  4. 04

    Prime and paint

    New board is sealed with a primer, then walls and ceiling are finished in a moisture-resistant sheen, with the tile edge cut in cleanly.

  5. 05

    Trim, casings and mouldings

    Baseboard, casings and any panelling are fitted in materials suited to the room, sealed on cut and bottom edges before fixing.

  6. 06

    Mirrors, hardware and final finishing

    Mirrors are hung to their backing, hardware is set at planned positions, joints are caulked and the room is cleaned down.

Surfaces specified for what each one is exposed to

Wet zone, splash zone, ceiling and dry wall each get the board, paint and trim the position actually calls for.

Questions

Frequently asked

Almost always condensation combined with an inadequate paint system, and behind both of those, insufficient extraction. The ceiling above a shower is the coldest surface in the room, so moisture condenses there first and sits. If that ceiling was finished with a chalky ceiling flat, or painted over new board without a proper primer sealer, the film has nothing to resist standing moisture with and it lifts. The fix is a moisture-resistant board and paint system, and a fan that runs long enough to clear the room.

No, and using tile backer everywhere is money in the wrong place. Inside the shower or tub surround you need a proper tile backer, not moisture-resistant drywall — they are different products for different jobs. The splash zone around the basin and outside the tub warrants moisture-resistant board, as does the ceiling, which is the coldest surface and where condensation forms first. Walls away from any water can be standard board. The point is that the specification follows the exposure.

In a powder room with no shower, comfortably yes, and it is one of the best places in a house for a paper with real character because the area is small. In a bathroom with a shower it is conditional: the substrate must be sealed and sized properly, a vinyl or non-woven product handles humidity far better than a traditional paper, and the seams should be kept out of the wettest areas. Whether it lasts comes down more to the extraction than to the paper.

Not standard MDF, which is the most common choice and the one that fails. MDF wicks water up from the floor and swells along its bottom edge, and once it has swollen it cannot be repaired, only replaced. PVC, primed solid timber, or a moisture-tolerant composite all handle the position far better. Whatever is used, the bottom edge and any cut ends should be sealed before fixing, and the joint to the floor caulked so water runs off rather than behind.

Sometimes, and it is worth trying, because a bulkhead added as an afterthought always looks like one. Whether it can be avoided depends on joist direction and depth — a waste line running with the joists can often be hidden entirely, while one running across them may need to drop below. Where a bulkhead is unavoidable, designing it deliberately makes the difference: aligning its face with the shower enclosure or a vanity run, or extending it the full length of the wall, so it reads as part of the room.

To solid backing, not to drywall anchors and not to adhesive alone. A large frameless mirror is heavy, and its weight is concentrated along the bottom edge, so blocking is installed between the studs during framing at the fixing heights the mirror needs. Where a mirror is going onto a wall that is already closed, the drywall has to be opened and blocking added. Mirror cabinets need the same treatment plus, in most cases, a cable brought to the recess for internal lighting or power.