Skip to content
Nanaimo Custom Bathrooms

Bathroom renovation services

Bathtubs & Showers

Showers built to the opening you have rather than sized down to a stock base, with the waterproofing behind them detailed before any tile goes on.

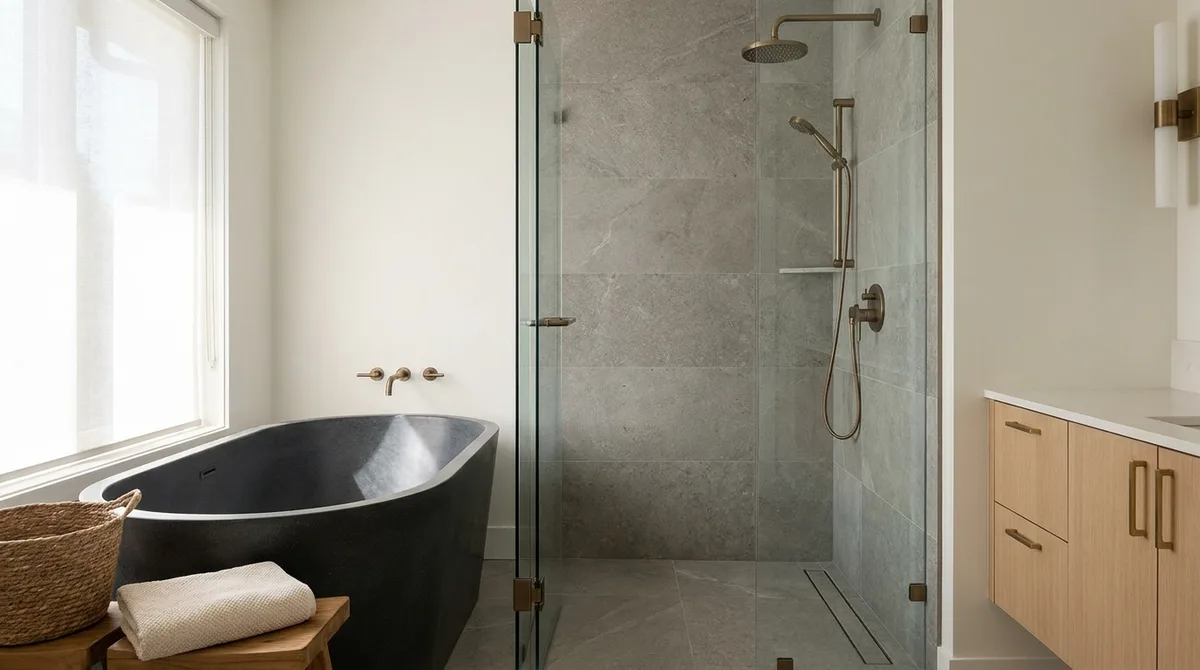
A tiled walk-in shower with a frameless glass panel, linear drain and a recessed niche

Showers are built to the opening rather than sized down to a stock base, and the waterproofing behind them is treated as structure rather than a finishing step.

  • Licensed & insured
  • WorkSafeBC coverage
  • Written quotes & contracts
  • Built to BC Building Code

What this covers

Bathtubs & Showers

The shower is the part of a bathroom that has to work hardest and the part where a shortcut takes the longest to show up. Everything visible — tile, glass, fittings — sits on top of an assembly that has to keep water out of the framing for the next few decades. Getting that assembly right is not more expensive than getting it wrong; it is only more expensive than getting it wrong today.

Built to the opening, not to a catalogue. A stock shower base comes in a handful of sizes, and fitting one into a 1,320mm alcove means either losing 180mm of the room or building a filler wall to make the opening match the pan. A site-built shower floor takes the dimension the room actually offers. That matters most in the small bathrooms common across older Nanaimo housing, where the difference between a 900mm and a 1,050mm shower is the difference between turning around comfortably and not.

What a proper shower build involves. The floor is sloped to the drain at a consistent fall — a uniform quarter inch per foot to a centre drain, or a single plane to a linear drain set at one end. Curbs are built solid and waterproofed on all three faces, including the top and the inside return. Walls get a substrate suited to continuous wetting rather than standard drywall. The waterproofing layer is continuous across floor, curb, corners and up the walls to above the shower head, with corners, changes of plane and the drain connection treated as the details that decide whether the whole thing works. Niches are framed between studs, sloped slightly so water drains out, and waterproofed as part of the wall rather than as a hole in it. Benches are framed and waterproofed like a curb, never hollow. Only after that does tile begin.

Walk-in, low-threshold and barrier-free. A walk-in shower with a low threshold or none at all is the most requested change in this region, and it is a floor-structure question before it is a tile question. A curbless entry needs the shower floor recessed below the surrounding finished floor, which means either dropping the joists locally, sistering and re-sheeting, or building the whole bathroom floor up to meet it. On a concrete slab in a condo, recessing is usually not available and a linear drain at the far wall with a very low threshold and a generous slope is the practical answer. Either way, water control substitutes for the curb: a longer wet zone, a well-placed linear drain, a fixed glass panel positioned to catch spray, and a floor tile small enough that its grout joints provide grip.

Tub-to-shower conversions. Removing a tub in a standard 1,525mm alcove and building a shower into the same footprint is one of the highest-value renovations a household in Parksville or Qualicum Beach can do, and it is usually more than a swap. The tub drain sits at one end and a shower drain usually wants to be central or linear, so the waste is generally relocated. The valve height moves up. The wall substrate behind a tub surround is rarely adequate for a full-height shower. Where a household has two bathrooms, keeping one tub is worth considering for resale and for anyone bathing children.

Bathtubs. Alcove tubs, drop-ins built into a tiled deck and freestanding tubs each make different demands. A freestanding tub needs a floor that can carry it filled and occupied, a filler either floor-mounted through the finished floor or wall-mounted at exactly the right height and projection, and enough clearance around it to actually clean behind — 100mm from a wall looks generous on a plan and is unreachable in practice. Drop-in tubs need an access route to the trap and overflow that survives the tiled deck being finished.

Enclosures, doors and surrounds. Glass is templated after tiling, not before, because the finished surfaces are what it has to seal against. Frameless panels need blocking in the wall for the clamps or channel, which has to be set during framing. Sliding doors need a level head. Hinged doors need to be checked against the toilet and vanity in the plan, and they should open outward so water runs back into the shower. Tiled surrounds, large format panel surrounds and solid surface surrounds all behave differently at the corners and at the wall-to-floor junction, and each has a joint detail that matters more than the material choice.

Coastal reality. Bathrooms on this coast dry slowly. A shower that stays damp between uses puts a continuous load on its waterproofing and on the wall assembly behind it, which is why extraction sized to the room and the waterproofing detail behind the tile carry more weight here than in a dry climate.

Why it matters

What you get

Full width of the opening used

A site-built shower floor takes the alcove's real dimension instead of losing 100–200mm to a filler wall built to suit a stock base.

Continuous waterproofing detail

Floor, curb, corners, changes of plane and the drain connection are treated as one continuous layer and checked before tile covers any of it.

Niches and benches framed properly

Recessed niches are framed between studs, sloped to drain and waterproofed as part of the wall. Benches are framed solid and treated like a curb.

Curbless entry engineered, not improvised

A barrier-free floor is resolved against the joists or slab first, with the recess, the drain type and the wet-zone extent decided before demolition.

Glass templated to finished surfaces

Enclosures are measured after tiling against the surfaces they actually have to seal to, with blocking set in the walls during framing.

Valve and head heights set to the layout

Mixer, diverter, rain head and handheld positions are set from the finished shower rather than from where the old pipework happened to sit.

How it runs

The process

  1. 01

    Assess the opening and the structure

    The alcove is measured, the existing drain and valve positions located, and the floor structure checked for what a recessed or curbless floor would require.

  2. 02

    Specify the assembly

    Drain type, slope direction, substrate, waterproofing approach, niche and bench positions and glass configuration are decided together, because each one constrains the others.

  3. 03

    Demolition and rough-in

    The old tub or shower comes out, waste and supply are relocated where the new layout calls for it, and blocking for glass, grab bars and benches is set.

  4. 04

    Floor, curb and waterproofing

    The sloped floor and curb are formed, then the waterproofing is applied continuously and checked — including a flood test where the assembly allows it.

  5. 05

    Tile and stone

    Setting out starts from the most visible plane so cuts land where they are least seen, with the niche and any feature banding coursed into the layout.

  6. 06

    Glass, fittings and commissioning

    Glass is templated and installed, fittings are set, joints are finished, and the shower is run and checked for drainage and door clearance.

Build the shower the room will actually take

The opening is measured and the floor structure assessed before any decision on base, drain or glass is made.

Questions

Frequently asked

Usually yes, but it depends on the floor structure. A curbless entry needs the shower floor to sit below the surrounding finished floor, which is achieved either by notching or sistering the joists to create a recess, by building the rest of the bathroom floor up to meet the shower, or by using a very shallow linear drain assembly. Which of those is available depends on joist depth, direction and span, and on whether there is a finished ceiling below. It is assessed at the measure stage because it changes both the cost and the floor level at the doorway.

They solve different problems. A one-piece acrylic or solid surface base has fewer joints and installs quickly, but only comes in set sizes, so the room has to be adapted to it. A site-built tiled floor takes any dimension, allows a linear drain and a curbless entry, and suits a room where the alcove is an awkward width — which describes most older bathrooms in this area. It depends more on tile size and grout maintenance, and it lives or dies on the waterproofing beneath it.

Beyond the build itself there are curing periods that cannot be compressed. Waterproofing has to cure before tile goes on, tile adhesive has to cure before grouting, and grout and silicone have to cure before the shower is run. Glass is usually templated after tiling and then fabricated, which adds time between the tiling finishing and the enclosure arriving. The schedule allows for these gaps rather than working around them, and they are set out before work begins.

If the house has only one bathroom, keeping a tub is generally worth it — for bathing small children, and because a house with no bath at all narrows its buyer pool. Where there are two or more bathrooms, converting the main or ensuite to a larger shower and keeping a tub elsewhere is the common arrangement. If mobility is a current or foreseeable consideration, a low-threshold or curbless shower is the more useful room to build.

Often, yes. A tub waste sits at one end of the alcove, and a shower generally wants either a centred drain or a linear drain along one wall, so the waste usually has to be relocated and re-vented. How involved that is depends on joist direction and access from below. The valve also moves up to shower height, and the wall substrate behind the old tub surround is normally replaced with something suited to a full-height wet wall.

A 900mm x 900mm shower is workable and common in small bathrooms. Around 900mm x 1,200mm is noticeably more comfortable and allows the shower head to be positioned away from the entry so you are not walking through cold water. If a seat or a bench is wanted, or if the shower needs to accommodate a second person assisting, the useful minimum moves closer to 1,500mm in one direction. These dimensions get tested on the measured plan before anything is committed.